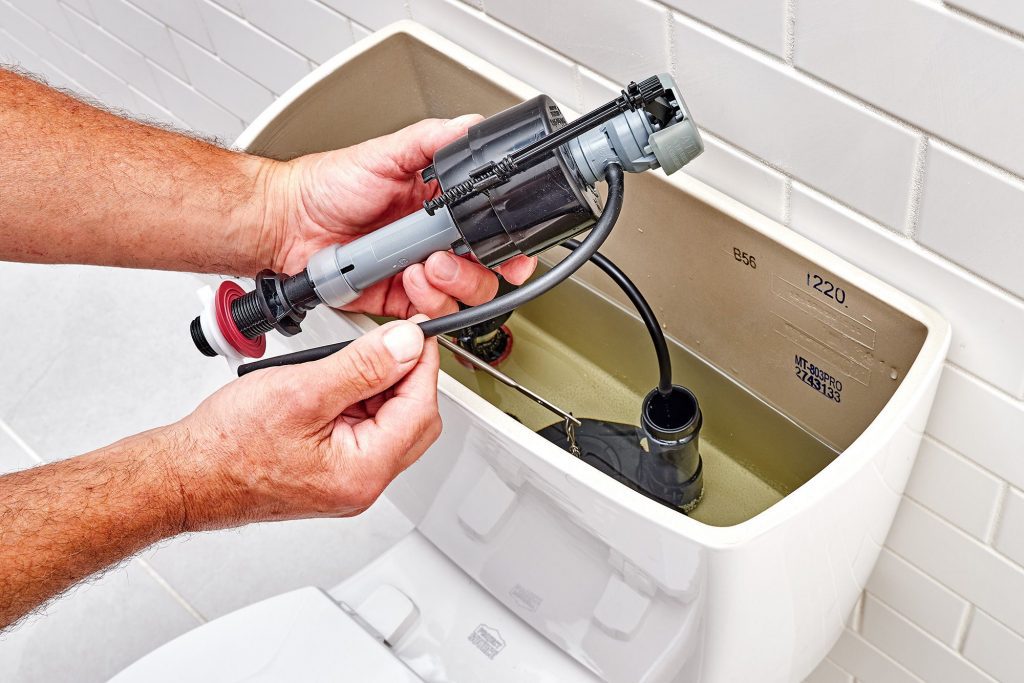
The flush valve on a toilet is a large plastic or metal fitting with a flapper attached that fits into the flush valve aperture. If the fill valve is not completely closed, the flush valve unit’s tall overflow tube will keep the tank from overflowing.
Mineral scale and corrosion can accumulate on the flush valve’s flat surface, preventing the flapper from closing tightly and leaking water. Knowing how to replace toilet flush valve is essential to conserve water and keep your toilet working properly. Let’s get started!

How to Replace Toilet Flush Valve
The flush valve should be replaced if water leaks from the tank into the bowl. Fixing a leaking toilet flush valve can reduce water waste and costs.
You may check for leaks in a toilet by placing a few drops of food coloring in the tank and waiting 30 minutes. Then, you can see if the food coloring has colored the water in the toilet bowl; if it is colored, it is leaking.
An adjustable wrench, plumber’s wrench, channel-locking pliers, a large flat screwdriver, penetrating oil, a new flush valve and flapper, a small bucket, and some old towels are all you need to repair the flush valve in your toilet.
Turn off the water supply
Activate the fixture shutoff valve on the water pipe near the fill tube that feeds the toilet fill valve. Sponge out the tank after flushing to remove any residual water. Loosen the connection nut connecting the water supply tube to the tailpiece on the fill valve to disconnect the fill valve.
The chain connecting the lift rod of the toilet handle to the flapper valve or flush cylinder must be removed from within the tank.
Disconnect the refill tube
Get rid of the cover on top of the toilet tank. Look for a red, blue, or yellow circular seal directly below the tower of the flush valve to identify the flush valve seal.
Before working on the flush valve assembly, you can wipe it down with a cloth. Locate the refill tube attached to the top of the flush valve; this can be done by drawing it out, unscrewing it, or releasing a clip.
Remove the toilet tank and bolts
Find the supply hose at the toilet’s base and disconnect it from the water source. After loosening the hose’s fasteners with an adjustable wrench, you can elevate the tank. While removing the tank from the toilet, carefully remove it from the base.
The second set of nuts that secure the tank bolts to the toilet tank can be hidden in plain sight. Do what you can to get rid of them.
Further, a hacksaw can remove the nuts and bolts from older toilets with tarnished interiors, where no other method has proven effective. After removing the tank bolts, the tank should be lifted carefully from the bowl and set down on a stable work surface.
Remove the old flush valve
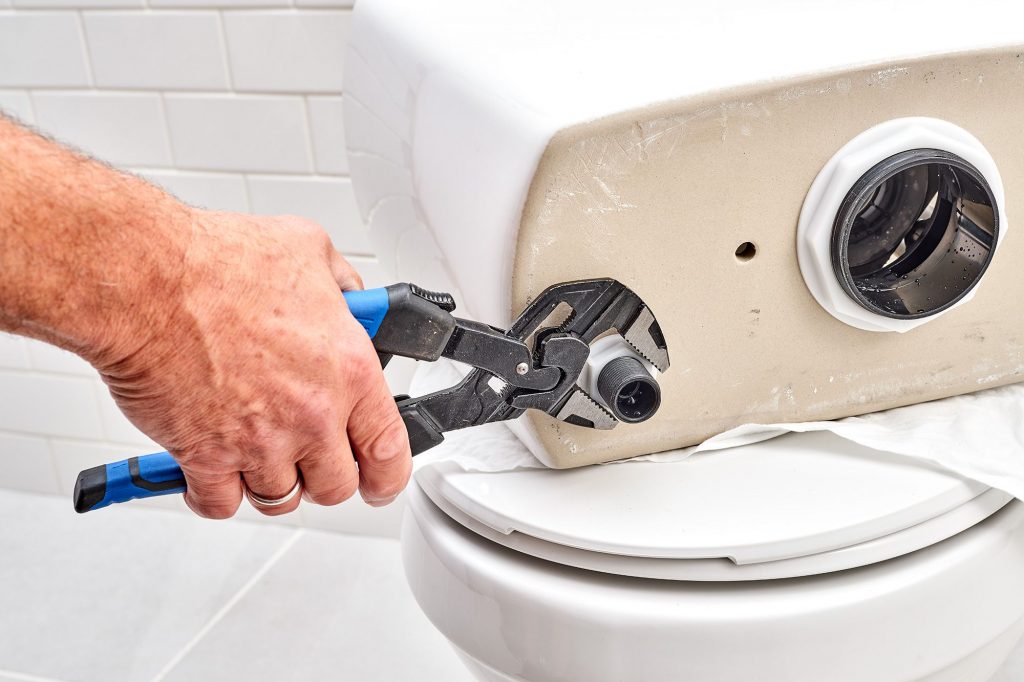
Take the tailpiece of the toilet’s flush valve and remove the large, pliable gasket. Remove the big spud nut that’s threaded onto the tailpiece of the flush valve using tongue-and-groove pliers. Carefully remove the flush valve from the tank.
Install the new flush valve and tank bolts
When installing the new component, refer to the manufacturer’s instructions. Replace the rubber gasket at the tank’s base.
The bolts for the tank are then secured via the holes in the base of the toilet tank. The rubber washers should be positioned under the bolt heads.
You should also secure the rubber washers over the bolts on the tank’s outside. A mounting nut is threaded onto each bolt, and the bolts are tightened until the rubber washers are slightly squeezed.
Check for leaks after filling the toilet tank
Fill the tank with water, turn the water back on, and inspect the underside of the toilet for any leaks around the tank bolts and the connection nut on the fill valve. When you find a leak, tighten the fittings until the leak stops.
If you want to be sure the toilet is working, flush it. The lift chain could need a little tweaking. When the fill valve doesn’t close after a flush, water may leak from the flush valve and continue to stream into the toilet.
In most scenarios, this can be fixed by adjusting the toilet’s flapper or tightening the tank’s bolts to bring the tank closer to the bowl. Avoid cracking the bowl by not tightening the screws too much.
Factors to Consider While Choosing a Toilet Flush Valve
Compatibility
Select a flush that works with your specific model of toilet. A variety of valves available today can be used with various systems. Take the valve’s dimensions before deciding how to proceed with the replacement.
Water saver
Modern toilets are very water-efficient, typically using less than one gallon of water per flush. Choose water-efficient flush valves to cut down on water bills.
Installation
Fixing a broken flush valve can be a frustrating experience. Choose a product that can be set up quickly and easily.
Durability
Pay close attention to how a flush valve is made if you’re in the market for one. To prevent rust or corrosion, the toilet must meet ADA requirements.

Are Toilet Flush Valves All the Same Size?
The size of a flush valve varies from one toilet to the next. While 2 inches is the typical width of a flush valve, it may not be suitable for your model.
Depending on the brand, the diameter of a toilet’s flush valve might be anywhere from 2 inches to 4 inches. Before getting a new toilet flush valve, make sure it is compatible with your toilet model by researching online.
Conclusion
Having a toilet flush valve in your house is mandatory. In the event of a malfunction, it is essential to fix or replace the toilet’s parts. However, the flush valve is an integral component of any toilet. If you notice a problem with your toilet’s flush valve, you must fix it immediately.
We’ve researched and prepared all the information you’ll need, from the right techniques to replace toilet flush valves to a list of the items you’ll require. If you want to fix your toilet flush valve perfectly, you should follow the steps mentioned above.